
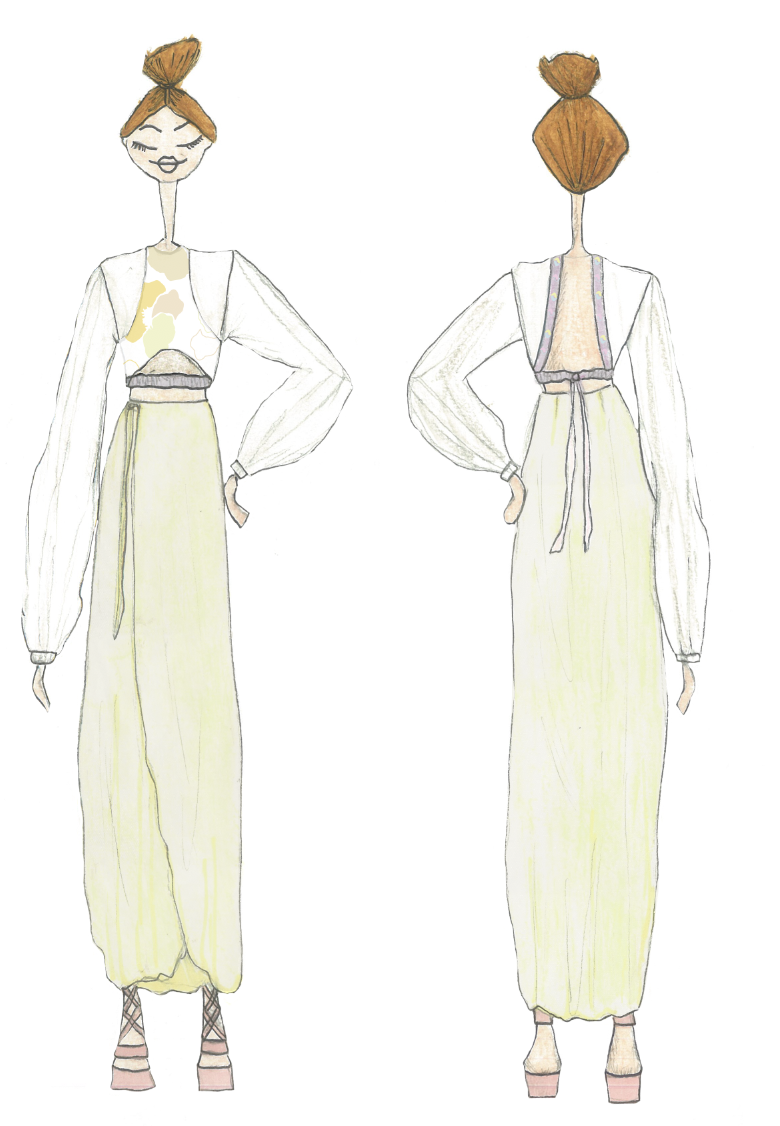
LOOK FOUR- Bridal separates
- emmaburke2701
- Aug 29, 2019
- 4 min read
Updated: Oct 20, 2019
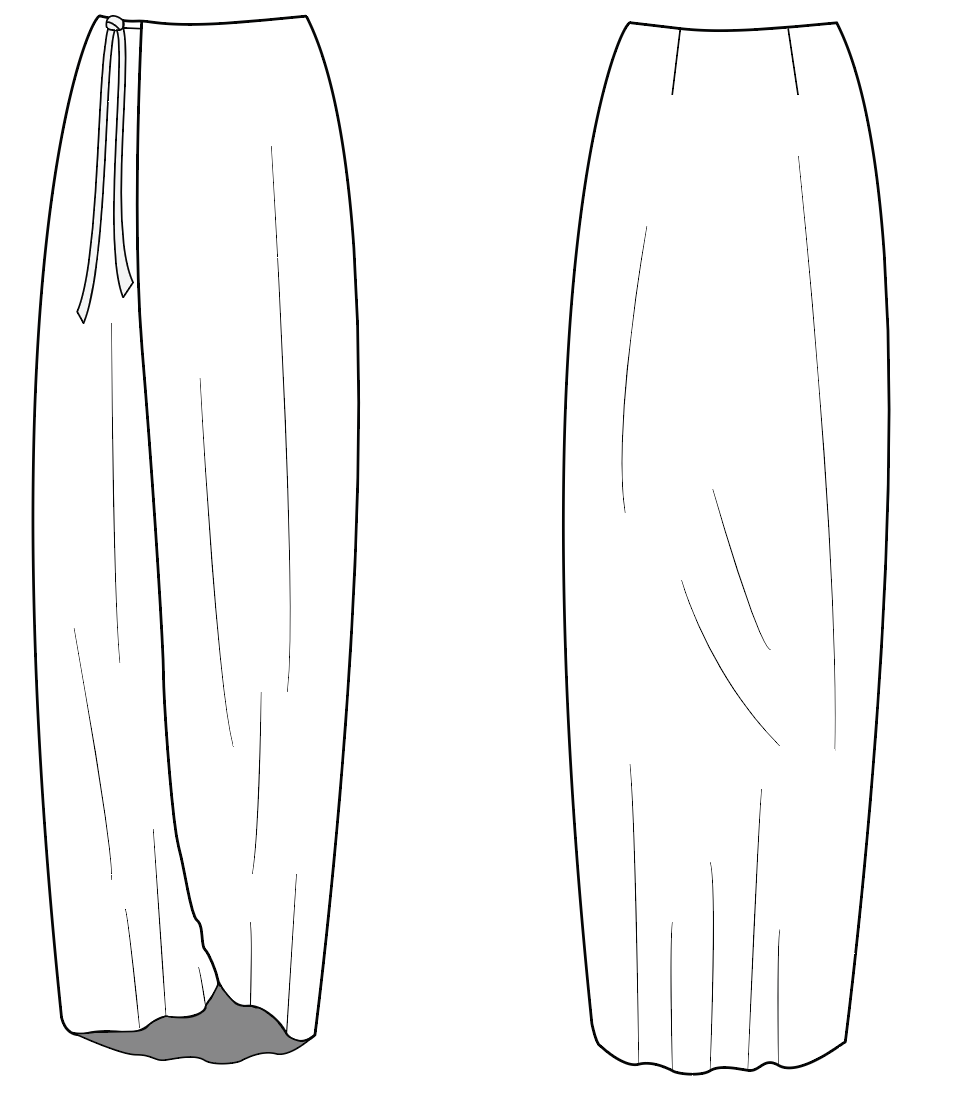
WRAP SKIRT ORIGINAL SPEC AND DESIGN DRAWING


Documentation
Wrap skirt- This was one of the easiest patterns to think about and put together, The skirt I originally designed and shown in my spec drawing was wrapped left over right but when thinking about the logistics and other wrap skirt designs I have come across I flipped this to the other side, wrapping right over left. This is something I just needed to update my spec drawing to show this


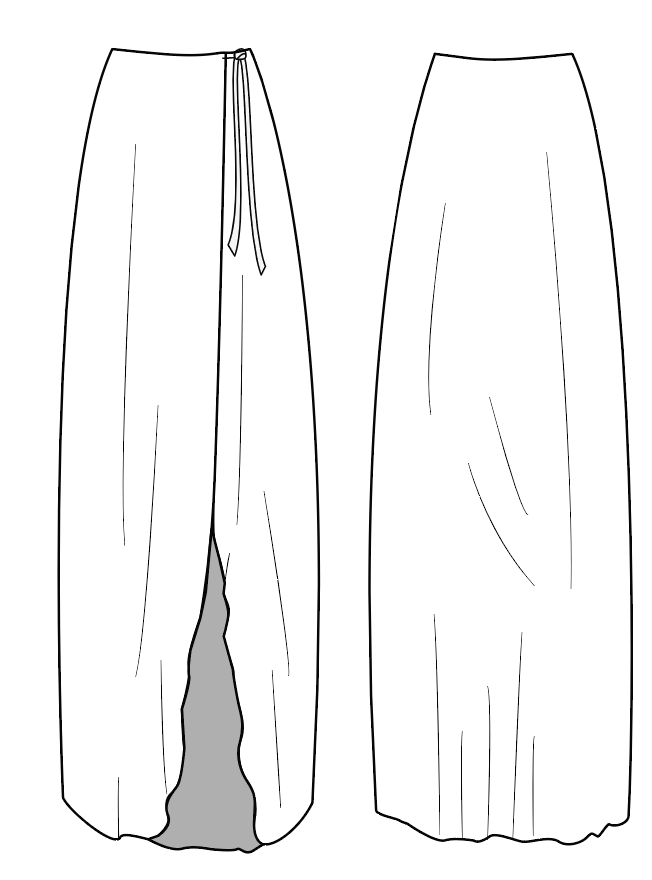
UPDATED WRAP SKIRT SPEC

I used the size 10 skirt block and placed the back skirt piece to create an open pattern so I will have no centre back seam. I had to eliminate two of the back skirt darts and take them out into each of side seams, leaving just two darts instead of four.
I then placed the front skirt’s side seam against the back side seams and traced them off. I had to take out the front darts into the side seam as well.
The skirt doesn’t have a waistband and instead is just faced with a lining. I left a hole in the side seam for the left wrap tie to pass through and wrap around the back to tie to the right wrap tie. This worked well, however on my final I will need to think of a neater finish. The final skirt is made from silk with a chiffon lining, so will be french seamed and hemmed with a tiny roll hem.


WRAP SKIRT TOILE CRITIQUE-
I toiled the wrap skirt out of a thin cotton lawn, I should have toiled it out of something with a little more flow that is more similar to silk because the skirt sat a little stiff. The fit of the skirt and curve of the wraps were good, when I make the final skirt in the silk fabric the wrap overs will fall and drape better.
Something to think about..
I could cut the wrap skirt on the bias to give it even more drape- After critique I suggested this idea and it was stated that the wrap skirt was good and being cut on the straight grain worked well. No changes are needed to be made to this skirt apart from a little bit of length added.
2nd TOILE-
I quickly mocked up a 2nd toile in a more drapey fabric just to see that the skirt would flow better. It certainly did so I was happy to move on to the final.


FINAL WRAP SKIRT.


I fusing taped the waist edge of the skirt. The lining was attached at the waist seam and is a free hanging lining that exposes itself at the bottom and wraps of the skirt giving a nice contrasting colour. I made a tie for the skirt by using my loop turner, and the hem on the skirt was like the dress and jumpsuit- using the applique scissors to create a baby lock hem. This sort of hem made the skirt have a nice wavy finish, I wanted to achieve this look so I am happy with it. Also instead of just cutting a slit to thread the waist tie through I did a button hole, however in the construction process I placed the button hole too high up and it got a little caught in the lining.
Fitting the skirt on another body..


LOOK FOUR TOPS-
ORIGINAL SPEC DRAWING


I had quite a bit of trouble with the top. My design was a silk crop top that I imagined to have mesh shoulder inserts that attached to puffy tulle sleeves. When I toiled this top I used french seam to practice them.


Things that went wrong..
Joining all these different materials together didn’t work very well. French seaming the top to the mesh inserts went all funny and distorted the shape and french seaming the mesh to the tulle just didn’t work.
From here I eliminated the mesh and replaced those inserts with tulle as well- this worked better for the attachment to the tulle sleeves but attaching the tulle to the top was a nightmare and the french seams were very messy. The design of the top was somewhat okay but the neck and shoulder points didn’t sit flat and the back design needed to change as it wasn’t wide enough to sit flat on the body it gaped out.


TOP TOILE CRITIQUE-
I went into the toile critique not happy with my top so was looking for some advice on how to fix it. I still wanted to use tulle but needed to think of an alternative way to go about it. I made a new design idea on illustrator and the tutors were happy with it they suggested making a separate tulle top like the spec drawn with an apron like silk over top- this will eliminate the need to join the tulle to other fabric.
UPDATED SPEC DRAWING-

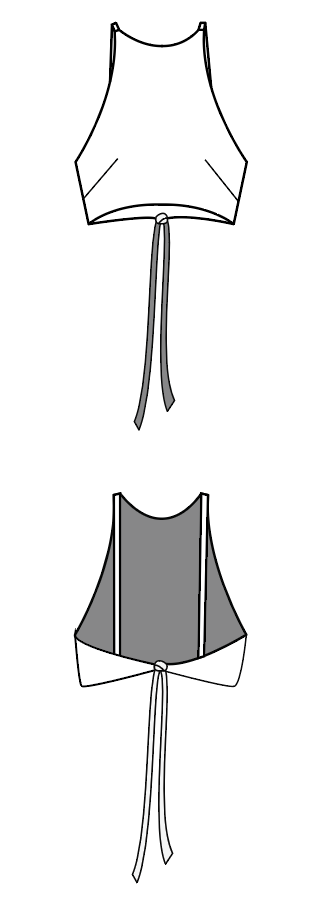


The Tulle top will be cropped and sit underneath the silk apron like over top. The tulle top will have roulette loops and covered buttons up the back.
I made the tulle top from the soft shell block because
FINAL TULLE TOP:


FINAL OVER TOP


Comments