
Embroidery Exploration-
- emmaburke2701
- Aug 27, 2019
- 4 min read
Updated: Oct 19, 2019
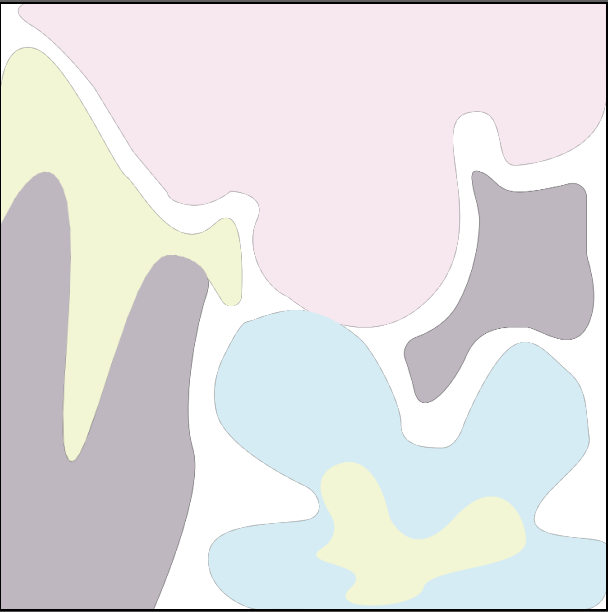
I did a digital embroidery paper in semester one and really enjoyed it- We had to make a clutch bag that explored a spray design of digital embroidery and potentially some hand embroidery techniques inspired by the botanical world. I went through a process of designing my embroidery through the exploration of lichen and its organic shapes.
The final design of my clutch is shown below


This design inspired the embroidery I would include on my look one suit jacket- I loved the organic shapes and circular motions. These are also mimicked throughout my collection with curved lines used through design lines, a curved yoke on and deep curve pockets on look 1's pants, a curved bodice design line one look 3's bias cut dress and organic cut outs on the bomber jacket and look 2's jumpsuit and lastly curved wraps on the skirt in look 4.
The fabric that I chose for my bridal suit wasn't the best fabric to use for digital embroidery, but it wasn't impossible either! I chose this fabric because it was a wool suiting that was the perfect pastel lilac grey to fit in with my colour scheme. The composition of the fabric is Wool, Lycra and Nylon. The lycra is what causes a problem for the embroidery machine as it causes the fabric to stretch. Therefore I needed to do a-lot of testing to ensure embroidering the suit was going to be possible. I had originally considered embroidering some of my other fabrics like tulle and mesh but after some research and discussions with Amy from textiles some of it wasn't possible.
"I wanted to incorporate digital embroidery into my 4th year fashion collection and was wondering if it’s possible to embroider on bridal tulle or stretch mesh? Also wanted to embroider on a wool suiting I have purchased but it has Lycra in it?"
"All of the fabrics you are asking about are very challenging.
Bridal Tulle and stretch mesh both do not have enough fabric structure for the stitches to lock into, so they don’t really work, too many holes. Bridal laces that you see made commercially are made on a different kind of machine that creates different lace structure locking stitches.
You may have more luck with the stretch suiting, but I definitely wouldn’t recommend it. Lycra in one way stretch fabrics tends to pull, stretch out of shape and pucker. It could work if you use fusible interfacing and block-fuse the fabric going into the frame to prevent all stretch while it is stitching, but this would also effect the drape of the cloth in the garment.
The other way to think of it is doing small motifs, like you often see on stretch rugby jerseys for example, and these are done with a very sturdy cut-away backing which limits stretch while the machine stitches. However, this may create firm badge-like effects in the spaces where the embroidery sits.
Can you work the embroidery into areas of the suiting garment where jacket fusing or other fusing is used? Like jacket front, or collar, cuff etc?
This advice was very helpful and after an induction with Amy I showed her my material and what I planned to do with it- we discovered it could be possible and planned what type of backing to use!- the one suggested is like a badge backing and is not a tearaway backing but it can be cut away quite close. The fused fabric reduces some stretch and then when paired with the backing fabric no stretch is present so the fabric should embroider nicely.
I set up a rectangle of fabric with multiple types of fusings on it and got my design digitised to do my first testings.


This is what I first imagined for the digital embroidery on my suit- but after careful consideration and thinking about the fused areas in a tailored jacket I have been more focused on embroidering the front of the jacket round to the side body.


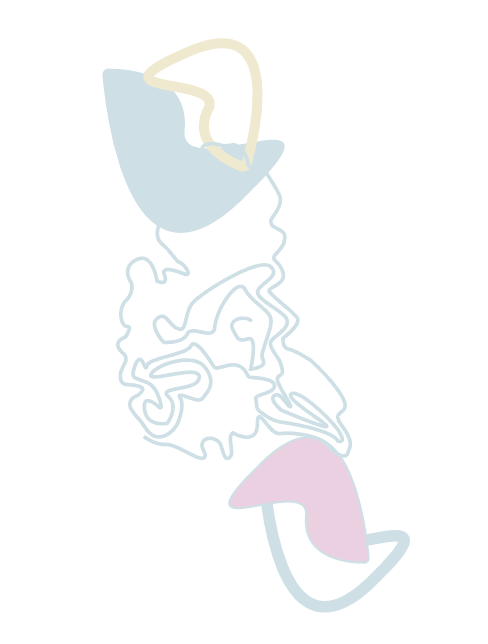
Inspired by my clutch bag design pictured above I went through a series of different ideas which eventually led me to my desired final designs.
Below are the first testing files I completed trying to figure out scales and densities of the shapes. Working out stitch lengths and if complex or running stitch designs will work better. Both files went quite well and I found that both complex fills and running stitch worked well. Densities were set to around 4pt and running stitch was 2mm.


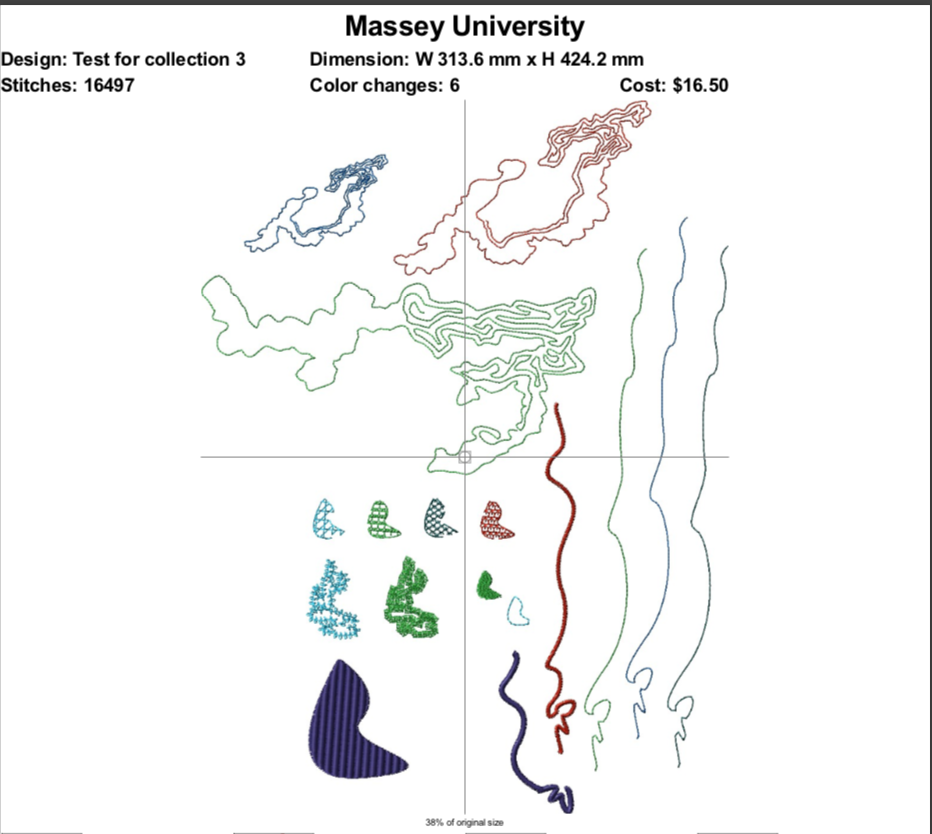
After this I went on to digitising my final embroideries.
1-2- Are the front right centre embroidery split into top and bottom design so it could fit into the embroidery frame.
3- Front right side
4- Pocket flap design
5-6- Side body design split into top and bottom design again to fit into the embroidery frame.


My final embroideries on the fabric- ready to be sewn together.
Featuring on the right front centre body, Right front side and the left side body along with the left flap pocket.
I was really happy with the final outcome of my embroideries and was excited to sew it all together to see the final product.


Comments